

Docker Demystified: A Beginner's Guide to Containerization
Unlocking the Power of Docker: Learn the Basics and Supercharge Your Development Workflow


According to the Stack Overflow Developer Survey - 2020, Docker ranked as the #1 most wanted platform, the #2 most loved platform, and the #3 most popular platform!
In this article, I will guide you through the process of containerization using Docker from scratch. We will begin by installing Docker and then explore images and containers through practical examples. Are you ready to embark on this journey? If you have any questions, feel free to reach out to me!
What is docker & Containerization?
According to IBM :
Containerization involves encapsulating or packaging up software code and all its dependencies so that it can run uniformly and consistently on any infrastructure.

Docker is a tool for running applications in an isolated environment called a container. It is similar to a virtual machine but offers advantages such as being faster, lightweight, and more efficient. Docker containers require less memory compared to virtual machines.
Docker Containers vs Virtual Machines
Containers are an abstraction at the app layer that packages code and dependencies together. Multiple containers can run on the same machine and share the OS kernel with other containers, each running as isolated processes in the user space.

Virtual machines (VMs) are an abstraction of hardware turning one server into many servers. The hypervisor allows multiple VMs to run on a single machine. Each VM includes a full copy of an operating system, the application, necessary binaries and libraries - taking up tens of GBs. VMs can also be slow to boot.
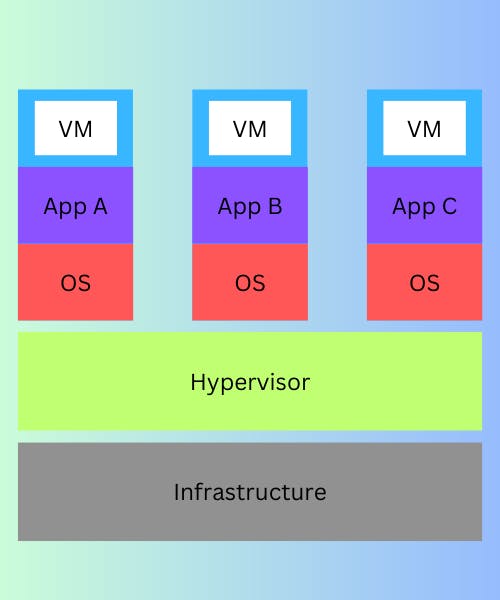
A container doesn't require a whole operating system! You can see that each virtual machine requires a whole operating system! This is the fundamental difference between a container and a virtual machine.
Benefits of using Docker Containers
Run containers in seconds instead of minutes.
Less resources, less disk space.
Use less memory.
Does not need a full operating system.
Deployment & testing.
How to download and install docker
To download Docker, navigate to Install Docker Engine | Docker Documentation.
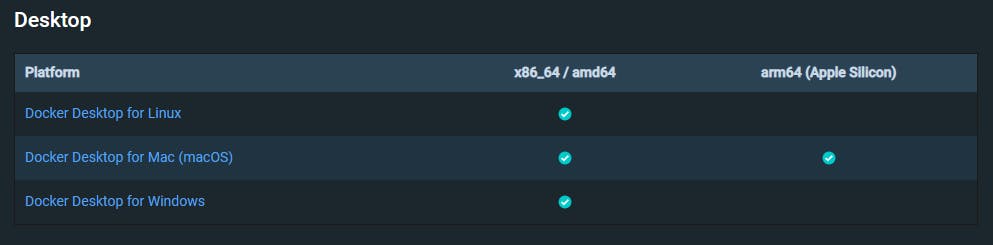
Then, choose your platform.

Then, download Docker and install it, the process is very straightforward!
To verify if Docker is correctly installed, type docker --version in your terminal:

Docker Images
Docker images are preconfigured templates for creating an environment of your choice, it could be a website, a database... An image contains everything your application needs to run, an operating system, dependencies as well as application code. A container is a running instance of an image.

When we create a Docker image, we can launch and run multiple containers based on that image. This means that a single image can serve as the blueprint for spinning up numerous isolated instances, each running as an independent container.
Creating Docker Images with Dockerfile
A Small Intro ...
In this section, we will explore the process of creating our own Docker image using a Dockerfile. By following some steps, we can build a customized image tailored to our specific requirements.
Step 1: Setting up the working directory
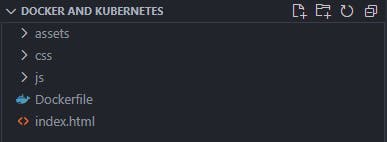
To create a Docker image, start by creating or downloading an existing project, such as a website, from the extensive collection available on Free Bootstrap Themes, Templates, Snippets, and Guides - Start Bootstrap Once you have the project downloaded, open Visual Studio Code and create a file named Dockerfile :
Step 2: Create the Dockerfile
The first command we'll explore is the "FROM" command. When creating a Docker image, we often start with an existing base image. In this case, we'll use the popular nginx image as the foundation for our own image.
FROM nginx:latest
This implies that our goal is to construct an image based on the latest version of the existing nginx image, which serves as our base.
The second command we'll cover is the "ADD" command. It allows us to add files, directories, or even remote URLs to our Docker image. This command plays a crucial role in including the necessary files and resources that our application requires.
ADD . /usr/share/nginx/html
The previous command adds all the files and directories from the current directory to the specified destination within the Docker image, which in this case is "/usr/share/nginx/html". This ensures that the contents of the current directory are included in the appropriate location within the nginx web server's document root directory.
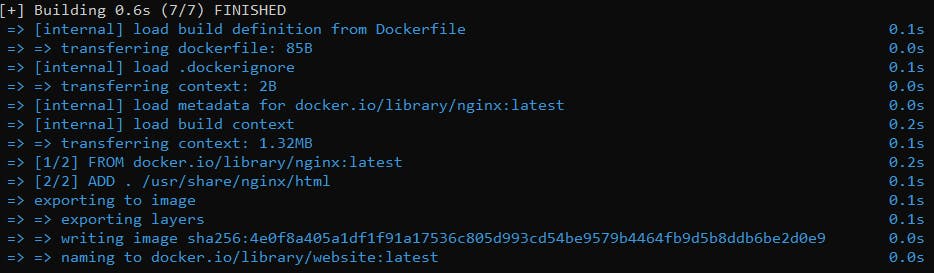
Step 3: Build the Image
Now, let's build our image using the following command :
docker build --tag website:latest .
When using the --tag option with the docker build command, the first parameter specifies the name of the image, while the second parameter indicates the version or tag to assign. By including the dot (.) at the end of the command, we specify that the Dockerfile is located in the current directory, indicating the build context for creating the image.
Now, If you execute the "docker image ls" command to list all images, you will see a list of images that have been built and are available on your Docker host. The output will typically include details such as the repository, tag, image ID, creation date, and size. The specific images you will see depend on the images you have previously built or pulled from Docker repositories. Each image will be listed in a separate row, providing an overview of the available images on your system.

Step 4: Run a Container from the Image
Now, that we have an image, let's run a container from it:
docker run --name website -p 8080:80 -d website:latest
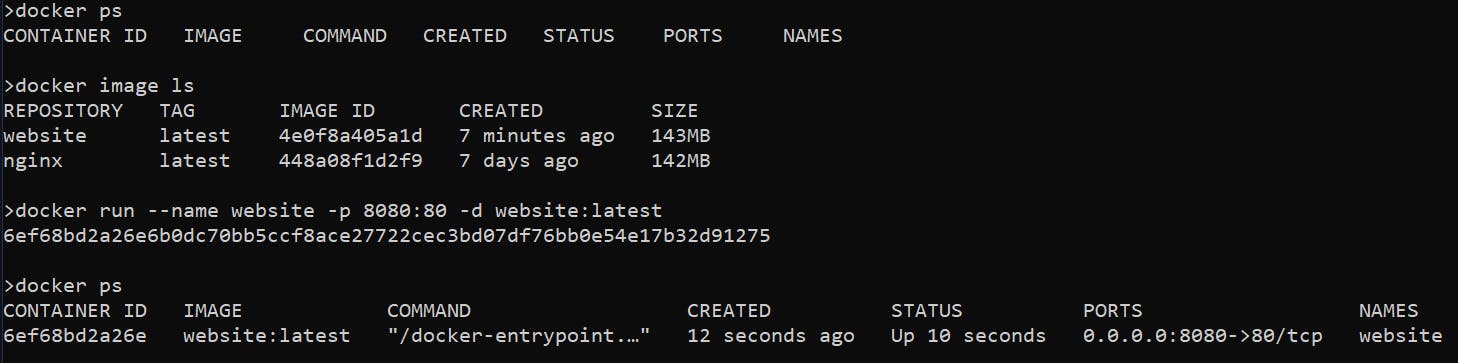
Once your container is running with your custom image (website:latest), you can test it on your host machine by accessing the URL localhost:8080 in your web browser. This will direct you to the website served by the running container. The application running inside the container will be accessible through the specified port (in this case, port 8080) on your local machine, allowing you to interact with the website as if it were running natively on your host :

Docker & Express JS Api
First, install node.js Download | Node.js (nodejs.org). Then, install expressjs Installation d'Express (expressjs.com)
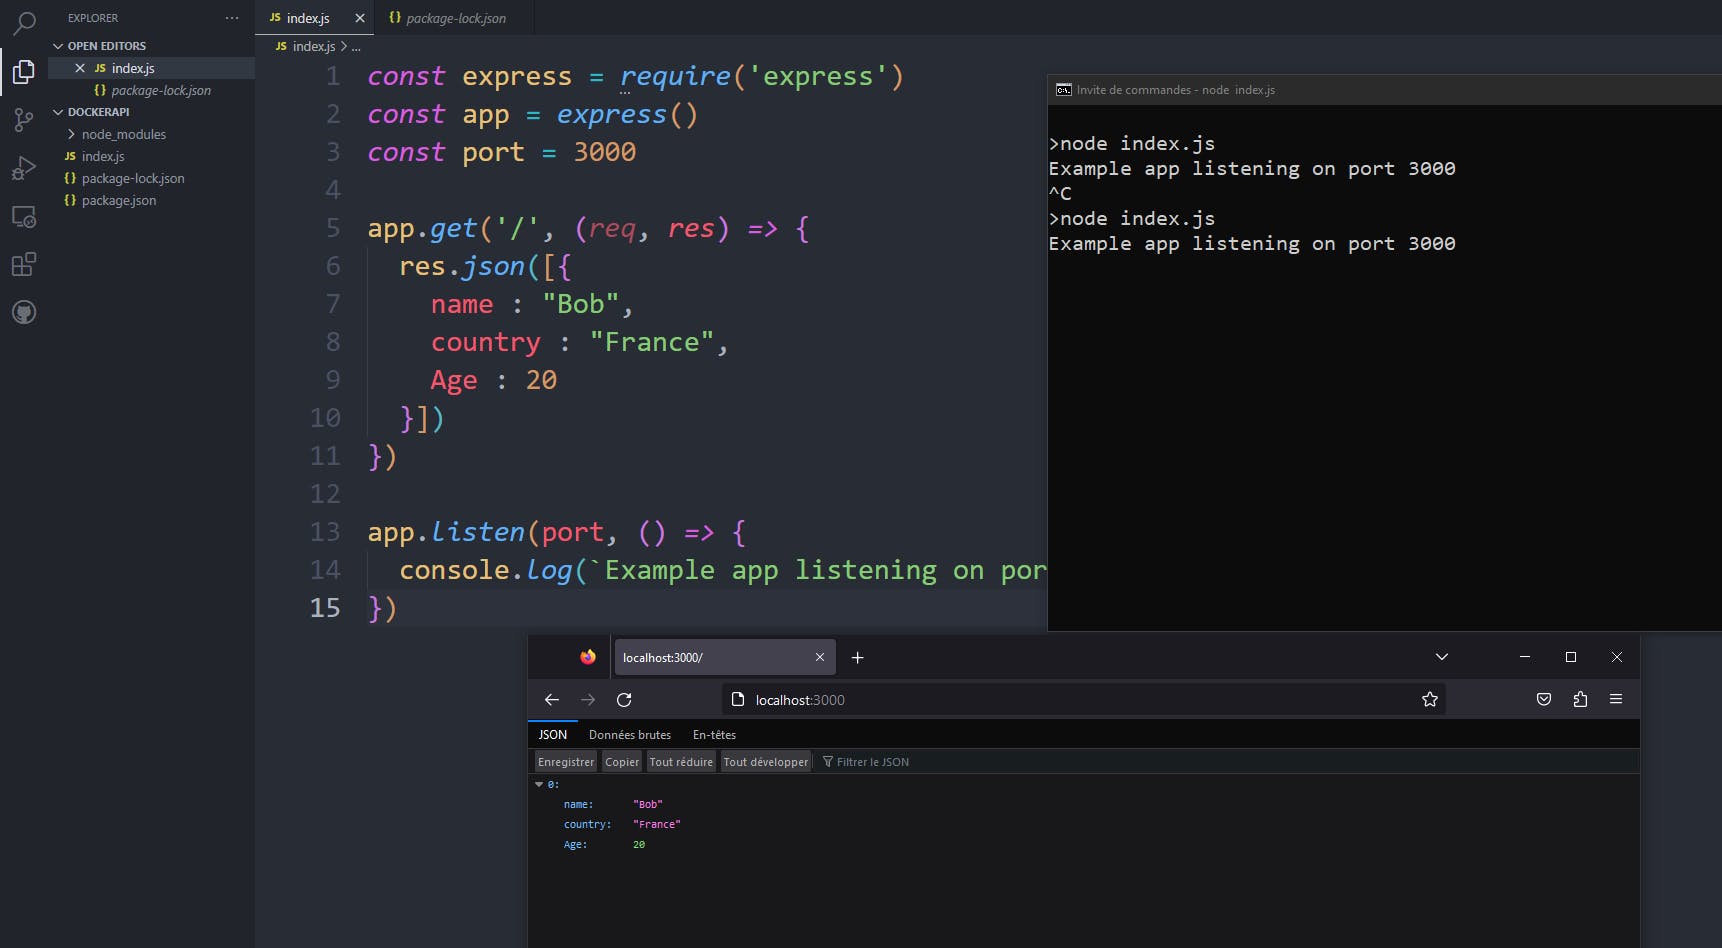
And then, create an index.js file as shown below:
Now, let's create our Dockerfile to build our image :
FROM node:latest
WORKDIR /app
ADD . .
RUN npm install
CMD node index.js
Then, let's create our .dockerignore file :
node_modules
Dockerfile
.git
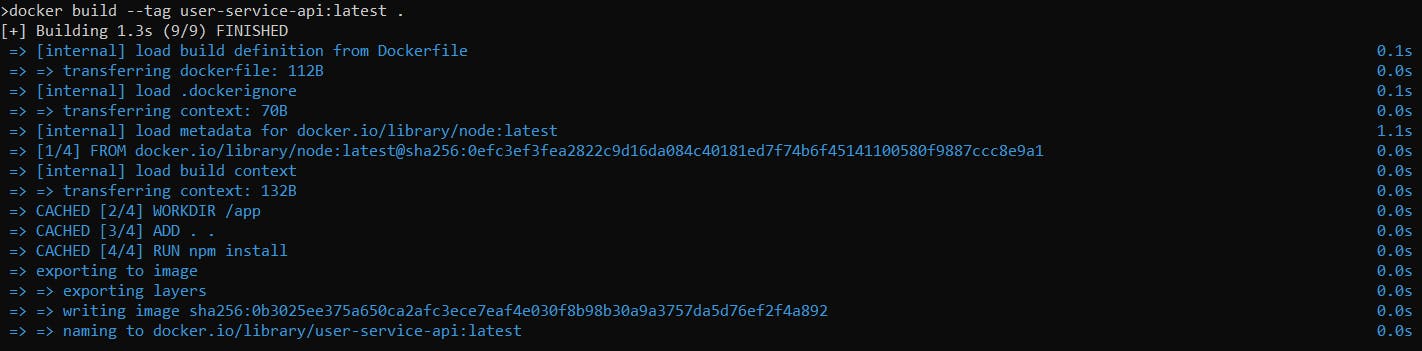
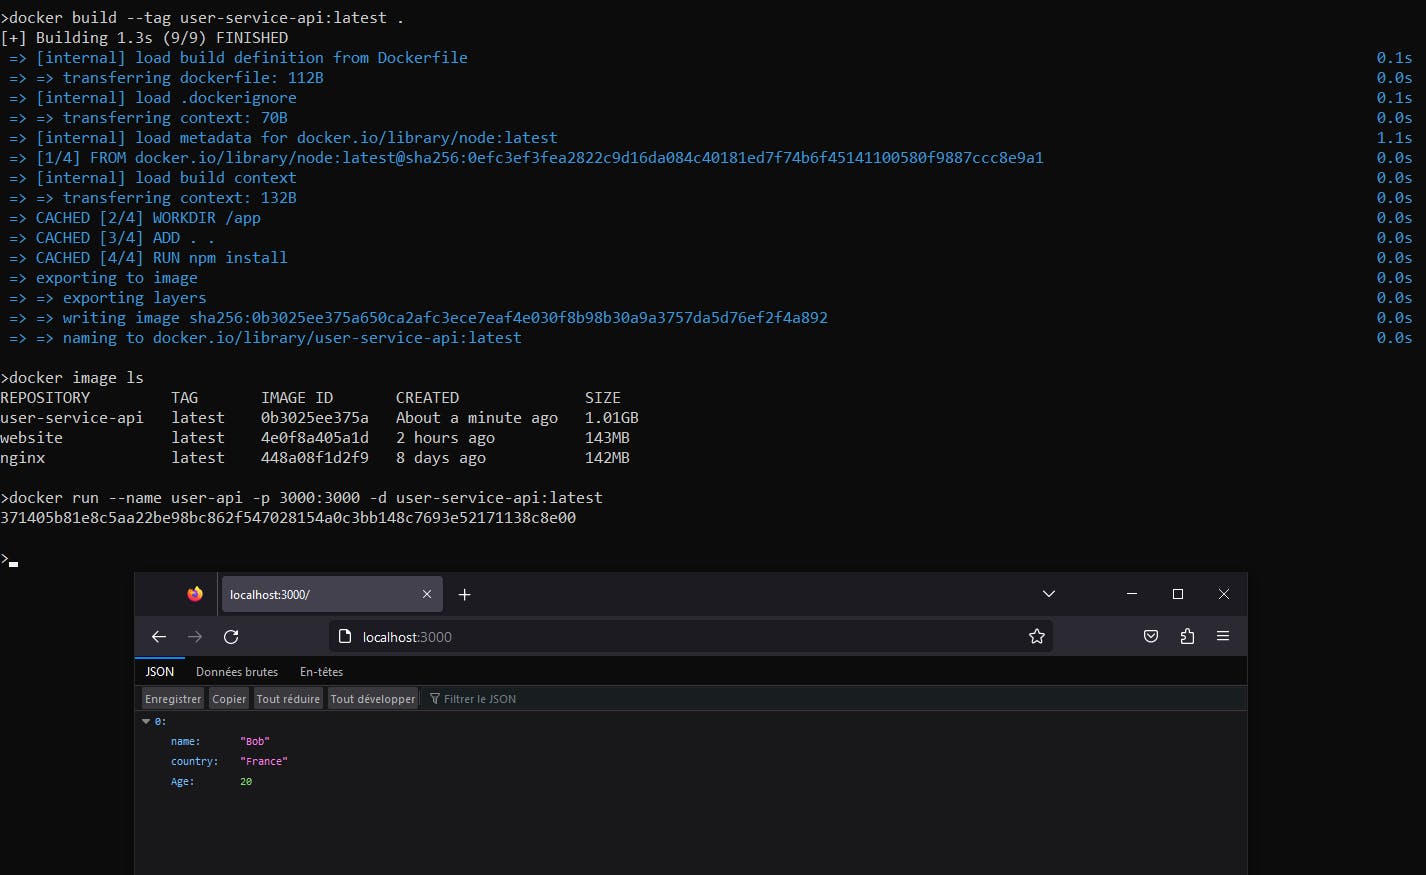
And now, let's type the command: "docker build --tag user-service-api:latest ." to build our image.
Now, let's run a container from our image:
docker run --name user-api -p 3000:3000 -d user-service-api:latest
Pulling Alpine Images
To minimize the size of the image, we use Alpine versions. Alpine refers to Alpine Linux, which is a lightweight and security-oriented Linux distribution. It is designed to be minimalistic, with a small footprint and optimized for resource efficiency. Alpine Linux is commonly used in containerized environments, particularly with Docker, due to its small size and fast boot times.
To pull the Alpine image, type the following command:
docker pull nginx:alpine
Bonus!
Subscribe to my newsletter now and receive free courses, valuable tips, and cheat sheets in PDF format! Stay up-to-date with the latest news and trends in your field and gain access to exclusive content only available to subscribers. Join our community today and start learning for free!
Thank you for reading, and let's connect!
Thank you for reading my blog. Feel free to subscribe to my email newsletter and connect on Twitter
If you like this article! Don't miss the upcoming ones, follow me and subscribe to my newsletter to receive more!
See you soon :)